Wednesday 26 March 2014

Mother's Day Gift Dilemmas

Mother's Day, it's always a tricky one.

When you have a parent who's not so keen on the whole home-made gift idea but already has everything else well what do you get? This year I've decided to just embrace the home-made and damn the consequences. A gifts a gift right? 

So I put my thinking hat on and decided to create one of these, a piece of word art.
There something you can buy anyway so why not use my initiative and make one myself.

I firstly tried Wordle, which I loved. So simple and easy to do and there are advanced options to funk it up a bit if you want to, but I couldn't get the shape idea I wanted ... so I moved through another couple of sites until I found Tagul.
After signing up I got to creating, and again it was so easy. Changing the colour and font style and even shape. Just what I wanted to do!
I made a few different designs and even tried inserting my own shape, still annoyed I couldn't get the effect I wanted with that, until I was happy while using the heart template they had.


Well, I thought I was after printing them (and realising I had no colour ink left - damn) I decided to alter them anyway.

Now just to purchase a nice frame and some chocolates and boom, present sorted. I hope anyway....


What gifts will you be giving for Mother's Day this year?

Tuesday 25 June 2013

Large Baby comforter / Small Banket


Easy Baby Blanket

Today has turned into quite a happy day. I have managed to create a new mini baby blanket and even did some up of whilst the little one was up! :-)


image
I didn't tutorial this one because I thought it would be a bit too simple. However I've got plans for another (quilted perhaps?!) so I’ll tutorial that one instead :-) I also have a girl’s design and fabrics to create it as well, but that will have to wait until there’s a reason, or a recipient ;-)
It’s a simple design but the fleece on one side makes it so cuddly!! I’m loving the trains and how it keeps it looking boyish! :-)
image
image
I even practiced some topstitching and managed straight lines (ish!) without unpicking. Which is shocking for my first attempt in a while!
What do you think?
Would your little like one?!

Tuesday 11 June 2013

Cushion Cover with an Envelope Close

Gift Away...


Today's blog is something I made as a gift, and being as such I had to take extra care when making it.
My mum was in need of new covers for her large cushions and wanted something which would tie in with her current decoration.

Before making I thought I might have more of a task on my hands as I didn't have the actual cushions in front of me for my own measurements and checking... Meaning that I ended up over estimating the amount of fabric I need, oh well more for the stash!
To make I simply needed the fabric to cover them and co-ordinating thread. The amount of fabric I needed for a 50x50cm cushion was 54cm wide by 124cm long (times two and including seam allowances). The extra length allows for a 20cm overlap.


  • Firstly I laid my fabric out and measured out the sizing, I made a small mark at each point in washable pen. **After completing the cushions I realised I should have probably made a paper pattern of fully marked the shape out to ensure an accurate size and straight lines, but it didn't matter in the end anyway.**
  • Next the two shorter sides needed to be hemmed. I folded these over approx. 1/2" and pinned. Due to the fabric I was using ironing these down first wouldn't work but if you are working in cotton etc then ironing them may help to keep them flat and reduce the number of pins needed!
  • After this the next step was folding the fabric to give the envelope flap. Lay the hemmed fabric down right sides up. Then fold each short side into the middle so that they cross over, the cross over should be about the 20cm you have allowed for, making the length the correct 50cm overall.
  • Once you have done this you simply pin and sew up the side seams!
  • Cut away any excess and clip your corners down for a sharper point, turn the cover inside out (you may want to poke the corners through with something blunt) put it on and you're all done.

If you really fancy it you can add additional decorative buttons, ribbons or ric- rac. Something's you might want to put onto the cover before sewing it together, just plan your design first! With these cushions I am considering whether they need a button or two across the envelope to hold it more securely just because the fabric is quite thin and unlined. However for now they're staying as they are for a trail and error run. 


Feel free to comment with your own pictures or links to how you did it.

Happy Sewing! :-D

A.

xox


The beautiful original fabric!
Cut out and ready to be sewn
Ta-daaaah!

Learning How to Blog

So I realised that it's all good creating a blog but if I didn't put the time in to actually work on the blog and continue to spread the word (as well as add posts) then what would be the point exactly?

I logged on and found that over this past month my page has been viewed 85 times. 85! Now that might not seem a lot but as I have tweeted just a handful of times now that's actually pretty damn surprising. It's really cheered me up :)
Given this I have been stumbling around the vast internet and very quickly came across a wonderful post on updating my header (HERE). Using this helpful advice and some creativity there is a new "fancy" header. Which I love :) - Well I sort of love because I'm still not 100% on what I've used as a name and if it needs more ... something... yeah that's how it is today; I'm lost for words!

So I've tinkered about with some minor bits and rechecked my previous posts for errors etc. You know all that boring stuff... I have a brother study English language and I know he'd go a bit blue if he saw how many spelling and grammar errors I make. Well that and the fact that I repeat words too much. Bad bad habits which I must escape!


On a lighter much happier note I picked up a tonne of material I'd ordered today. No joke 11kg of "scrap-box" pieces which turned out to be a wow buy with some huge pieces in! Plus some striped material to make myself a little something, and a metre of polka dots. Can't not love polka dots!
Now all I need to do is get myself in gear and actually create some of these ideas in my head.
Firstly I'm thinking a new comforter for little bear seeing as he thinks he's Iggle Piggle walking around with a blanket constantly! Doh!


Any suggestions from the viewers?

Amy

xox.

Friday 7 June 2013

Father's Day... To buy or to make?

What to get the man with everything?! The Stress!


For me father's day is more stressful than mothers day. I know what to buy my mum, I know what she likes, what she wants and what she needs - easy! But when it comes to dads its a different ball game. You'd think spending so much time with my dad as a kid and being daddy's little girl would make it easier but no. I still know what he likes but finding what he needs just doesn't happen, he's such a spoilt guy and when the cash flow isn't good...

So this year I decided to be a child again and make something. Whether it'll be appreciated is unknown..
I used the instructions from Sewing HQ magazine for a tea coaster (but with a twist as I found I cannot blanket stitch - please someone help me, seriously!!!) And I followed the tutorial from CraftyCupboard to make him a simple business card holder.
Hopefully he'll like the thought even if its a sewing fail.


For the Other Half... 

I also have the fun times of getting my partner something from our little boy. And for this crafting just won't do. Sadly he's one of those men who just doesn't need more craft items and wouldn't appreciate the time and effort :-(
Personally I think the sound of my sewing machine is going to eventually send him mad but hey that's tough luck! So for him it was the "shop shop shop" option and hoping to find something useful without breaking the bank. Fingers crossed!


It's all different this year...
(Yes I already have brought and made everything, did I mention I like being prepared and organised?!?!)
But I'm keen to know, what do you get your own dads and dad-partners?


A.
Xox


Here's the comparison between what the mag showed and what I made. Need to work on that blanket stitch!
And the bottom is the business card holder, initialled for that personal touch!

Wednesday 5 June 2013

From a Dress to a Simple Skirt

When you find something pretty and broken you know there's got to be a way to fix it, right?


So this is a really simple idea, I brought a dress second hand and where someone had tried to cut the back label out they had also snipped the fabric (naughty, naughty!). I really liked the print on the skirt and thought it would still look good on its on and not as the dress. So I got snipping and sewing... 

**Advanced apologies prior to reading for the error of my photographing skills. I was using my phone rather than camera and didn't really think about the issue of photos being taken the wrong way to each other  So they have a bad quality and don't sit flush but it works better than just words... right?!**


So firstly I checked the dress itself on me in case I needed to adjust anything. Once happy with the fit I turned it inside out to look at how to detached the skirt.


Due to the waistband it seemed easier to just cut it like so and not unpick bits. This also left me with the tie around belt pieces. There was a small bit of elastic at the front to create the gathered look. I unpicked this - never know when you might need it! (This could be the reason for my huge fabric stash. OOPS).

Then I measure my new elastic for the waistband and got cutting (double check your own waist and how much your elastic stretches first!) After pinning the elastic on and photographing it I realised I'd used the wrong method for pinning elastic so I haven't included that step in the photos- I don't want you guys to be extra confused by me! Instead of doing this with a million pins all you need to do is pin it in four places - fold it in half and downwards pin each side, fold in the opposite way and pin again at the sides. Make sure to stretch the elastic as tight as you need it to go. Sew it around and there you go!


Although I like it on I'm not 100% sure whether I will go back and add a top, it could make my life easier for grabbing clothes but then my options are limited (I'm thinking a light pink tank top effect).

Any suggestions? Feel free to comment and let me know :-)


Amy

xox.

Previous Creations!

So this quick post should be photo heavy, just to show something's I've created prior to the blog so I didn't photograph the stages or anything for a tutorial....

Hope you enjoy :-)

Amy

xox


Purple Hoody with lined black hood - Recycled from an adults hoody (below image)!


These dungarees are my favourites and yet the length is already bcoming too small!
They were made from a knee length denim skirt (size 6 so minimal material) and a fat quater of mr.men fabric (with some scraps leftover!)

My only issue was that'd I'd never used snap's before, at least not the ones with a machine! So the straps didn't come out like I wanted and they are a let down... Originally I wanted to be able to reverse them at any point (they're lined with the mr.men fabric) but I just couldn't figure it out and was getting too stressed... They do however cross over! - and hold much better that way :)

The shorts basically hold themselves up. Little bear was happy with them anyway!


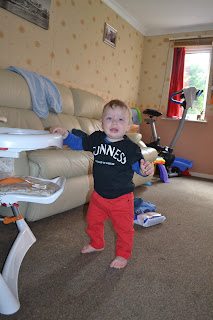
 I'm not an alcoholic ...  I just couldn't resist!
Resized from a man's Large t-shirt with three buttons at the neck..


Not the best picture but for some reason I can't find any others. I made this reversible cosy toes! It might look like it's sat funny but it's not thats the design from the original cosy toes still. One side is large spotted fleece and the other is a smaller spotted cotton. Keeps bear snug in winter time!

Ok so apparently I wasn't allowed to take photo's of little bear in his trousers :(
These are 100% linen... and you guessed it refashion from a pair of men's trousers I got at the charity shop.
I struggled like mad with the croth. It just wouldn't work :( and I also realised I hadn't taken the bum shape and nappy into account. But trial and error... they are still wearable for a bit longer  and I have more of the original trousers left to create some more... Happy days!


Quick and easy joggers - used the sleeves from a  misshaped zip up hoody